Hopefully this page will give you enough information to build your own AirWhere unit! - any feedback please feel free to contact us. The whole process from start to finish will take around 2-3 hours, 20 mins or so to see a yourself on pages on LK8000 or XCSoar and see yourself on the web, the rest to build the unit and box for it. AirWhere is FREE ! will alway be FREE, all help with testing and improving this idea will be gratefully accepted :)
To build an AirWhere unit, you will need to know how to install drivers, to download and unzip from the web, soldering skills and some idea of how to make a box to fit it in.
Please read all the instructions on this page fully before starting! Thanks
Notes
(i) The web upload that is setup in the following text only is activated at boot, if it can connect to the web it will do, if it cant, it will leave the web down, if at any point the web station is disconnected then the logging will stop until the board is rebooted, unfortunately this is a limitation of the hardware, hopefully when the new ESP32 comes out we will be able to solve this.
(ii) Currently on LK8000 on the kobo if theres a network disconnect, it sometimes will just wait and not be able to connect, hopefully a later release of LK will solve this problem.
(iii) Currently when running XCSoar with bluefly, when using the TCP Server, XCsoar will drop the GPS connection, not sure if its just mine or on all versions - reported to XCSOAR.
(iv) To create a more stable AirWhere we reduced the baud rate of the bluefly vario down to 9600, it does work at 57600 but more stable at 9600.
(v) Currently tested on LK8000(kobo,winCE),XCSoar(kobo,Android).
(vi) If you manage to get this working on any other hardware please write a How To and some pics and send it in, thanks
|
Step 1-8 : Software Install |
| Step 1 : Purchase a Nodemcu Board, it needs to be one of the latest ones, we have tried the amica board and the lolin board, both work fine, cheapest we have found is ebay at a massive cost of £2.99 delivered - a link to one NodeMcu Board |
| Step 2 : Plug the board into the a PC USB port, you may need to install drivers for the nodemcu, the Lolin board uses the CH340G Usb to serial drives and the Amica uses the CP2102 drivers, just search the web to find the latest version. Once these are install your board should come up in windows device manager under Ports, make a note of the port its installed it to, this may change. If you cant find them we have a version on our downloads page. In the case below the Amica board is on COM3 and the Lolin board is on COM14 |
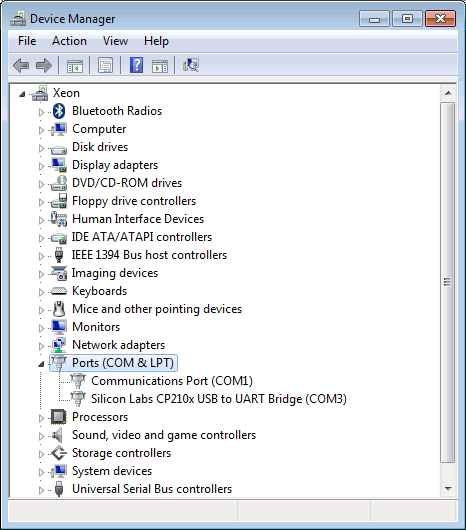 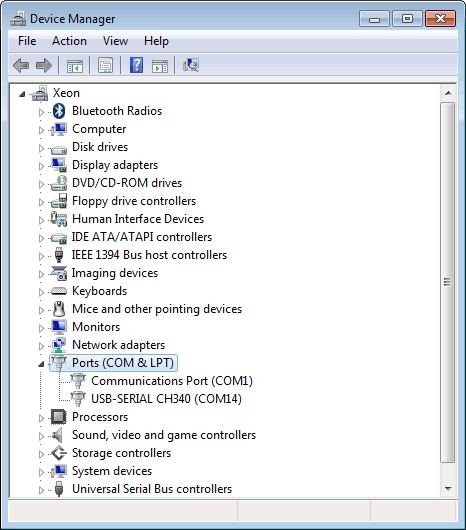 |
| Step 3 : Flashing the board - we need to download a flashing program and the binary the chip runs on, first create a directory on your hard drive and then download ESP 8266 Flasher and then the AirWhere binary into this folder, unzip the Esp Zip file there |
| Step 4 : Navigate to the newly created folder and run the ESP8266Flasher.exe file, select the com port you have found before in Step 2, click on config at the top, click the little gear icon next on the first line and select the AirWare.ino.bin file you have downloaded. Now return to the Operation tab and press flash , the board is now ready, unplug the board from the USB power supply and plug it back in again. |
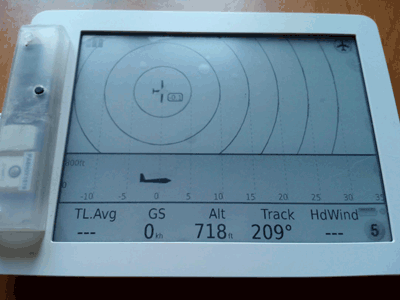
| Step 5 : Take your phone, laptop or kobo and open the Wifi connections, you should have a new one named AirWhere with some numbers, these numbers are your board number, this will be your pilot number aswell. Connect to this Access Point using the password 12345678, sometimes it can take a couple of times to connect, it can take quite a few times to connect on the kobo, this is because the kobo tries to connect to the internet to find out if it should bring up its network, we create a dummy network for it to attach to. Now on the same device open up a webbrowser and enter http://192.168.4.1 , this is the default webpage. Press configure, if you wish to upload to web fill in your router details here, also choose whether you will be running LK8000 or XCSoar , then press Submit, this Node board should reboot and be all up and running, you can reconnect on the same Access Point and check the values are entered, if the board doesnt reboot, just unplug it and plug it back in again. ( more flight software coming soon - alternatively if you wish to support AirWhere on your instument please contact and we will do our best ) If you get AirWhere running on different unit using the following steps, please take a picture and send it us so we can add it to the list! To test the web connect, you should be able to connect to the Node via a device on your home network, take a look in your router config for the IP that its assigned the Node ( usally ESP_{numbers} ) and then you can actually configure via the web. |
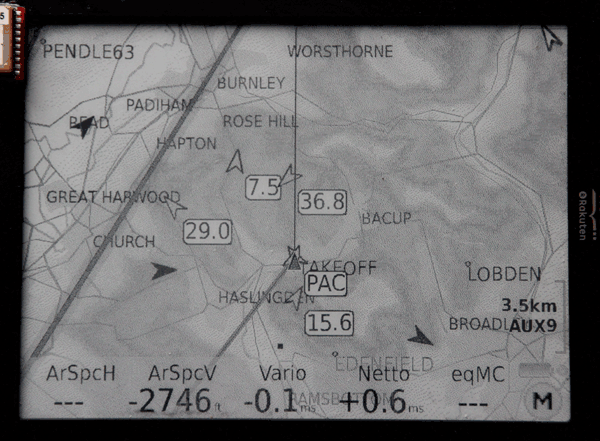
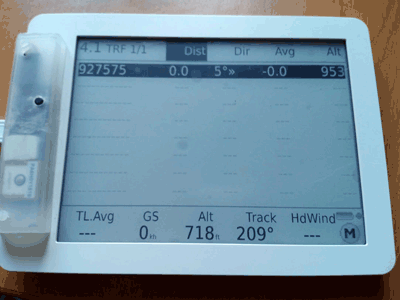
| Step 6A : LK8000 on Kobo Hopefully you should have connected your Kobo to the AirWhere Access point, when the kobo is rebooted into LK the network should automagically come up, please make sure you only have one Access Point in the Kobo settings, the AirWhere access point. After loading LK8000, navigate to, Config, config, LK8000 Setup, Device Setup. Please select in this page on Device B , Name NmeaOut, Port TCP Server, Ext: Sound OFF, Port 4353. Pressing Terminal and Device B, should show lots of lines of $GPPGA and $PLFAU, returning to the main screen LK should report its found the device and you should be able to navigate to the screens ( middle bottom and middle left) |
  |
| Step 6B : XCSoar on Kobo Hopefully you should have connected your Kobo to the AirWhere Access point, when the kobo is rebooted into LK the network should automagically come up, please make sure you only have one Access Point in the Kobo settings, the AirWhere access point. Boot the kobo into XCSoar, on the startup page please select Network and then Wifi On, then press close and run XCSoar. Load the menu and then Config, Devices, your GPS should be on device A and functioning, on Device B enter :- Port : TCP Port, TCP Port : 4353, Driver : Nmea Output. On device C , enter Port : UDP Port, TCP Port 10110, Driver Fl arm , when you press monitor on the Port C you should see lots of lines of $GPPGA and $PLFAU, and the Port return FLARM; connected |
  |
Step 6C : XCSoar on Android Connect to your AirWhere Access Point on your Android. This version , we need to use another program to send AirWhere strings for the GPS, please download Share GPS from the android Play Store, load this application and then create the following connection, NMEA, TCP port 4353. Then click on connections and your new connection will be showing as IDLE, click on it, it should say listening and then turn to connected. Now run XCSoar and Load the menu and then Config, Devices, your GPS should be on device A and functioning, on Device B enter Port : UDP Port, TCP Port 10110, Driver Fl arm. When you monitor this Port you should see the $GPPGA and $PFLAU strings
Note : If your using a Dell Streak you need to be on Android version 2.3 to use Share GPS, please update, let us know if you need any help, this video shows how to update to 2.3 :- video. |
  |
Step 7 : Testing the board via the web :- we can now see if its working, hopefully you should be able to see yourself on AirWhere Test Map, this shows the last positions of your unit, it will upload a new marker everytime your unit uploads its position to the web, to clear, refresh
Note : The GPS needs to be active and have GPS lock for the device to start web upload. |
| Step 8 : To see yourself on the Fl arm system then you can connect the TX and RX on the board together, this will feed your radio signal out and back in, you should see yourself ! - to flash the system again, you will need to unplug this lead. |
  |
   |
   |
Building the hardware |
Step 9 : You need now to purchase 2 radio transceivers, a Voltage dropper to bring the voltage down from 5v to 3.3v for an ARF RF module, the most expensive part of the kit , then you will need a project box to house the unit and some wires to connect the system.
Links :-
Nrf905
ARF RF Module
5v-3v PowerPod
Ribbon Wire
Power and Transmit LED
If you know of anywhere to purchase these items cheaper please let us know.
|
Step 10 : Wire up the board as per the diagram below, add the ARF Module first, then test, the Transmission light should flash every second when the board is connected to the Flight software, the Power light on permanently.
NICE DIAGRAM HERE
|
| Step 11 : Box Design. TBC |


